Account Creation
- Go to the Clockify website https://clockify.me/. Click “Sign Up” and create an account.
- You can download the Desktop App Windows/Mac by clicking on your profile picture in the top-right corner. Select “Download app”. Choose your operating system and follow the installation instructions.
- Once the contributor is done creating a Clockify account, the Talent Support team will send an invite to them to join the
🔥 Ultimate Workspace 🔥
Basic Setups
-
Set your timezone to CET.
• Click your profile icon in the upper right corner > Profile Settings > Time Settings > Time zone > choose (UTC +1:00) CET. It’s normal to receive a timezone mismatch notification.
• Reason: This will ensure that we have a centralized timezone for checking hours, as the default setting is based on your local timezone.With this, everyone in the team can see the same number of hours reported. -
Set your working days. Default work days are Monday to Friday. Check the
TimesheetorCalendartabs and confirm if the grayed out days are your weekends. Reach out to Freshelle/Nico if you want to update your work days. -
Optional: Activating
Task filterif you prefer tracking hours on a per task basis, not per working group/project.

 Video guide here.
How to Report Hours
-
Option 1: Clockify desktop app.
Video guide here. -
Option 2: Clockify browser. Add hours in the Timesheet or Time Tracker tab.
Video guide here. -
Note: You can change the search setting to show results by “Projects/Working Groups” or by “Tasks”.
Video guide here.
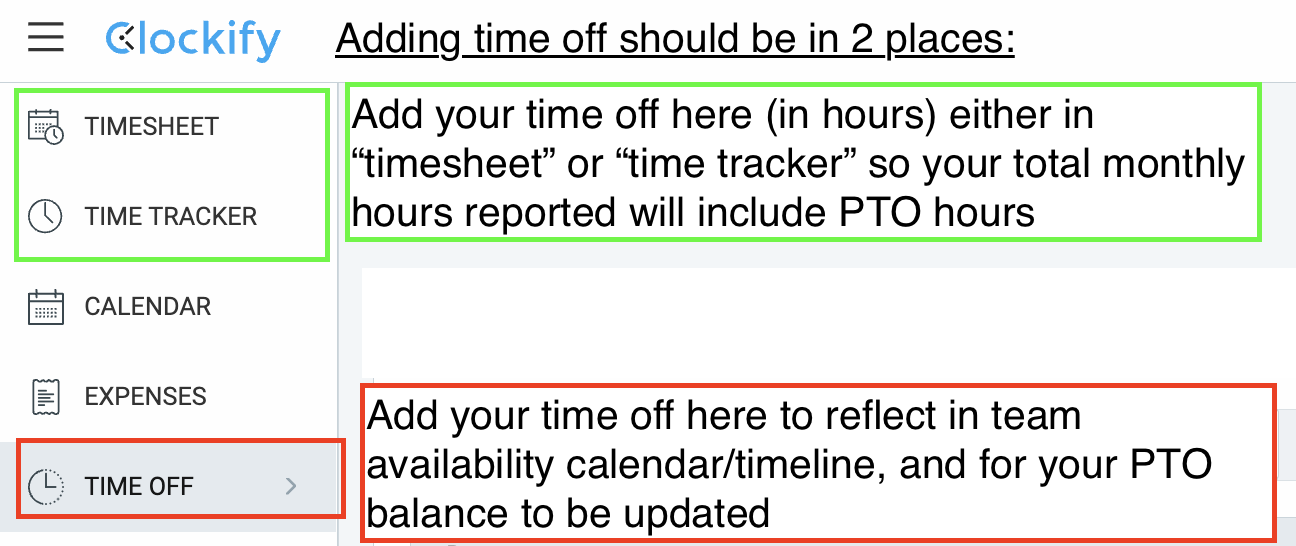
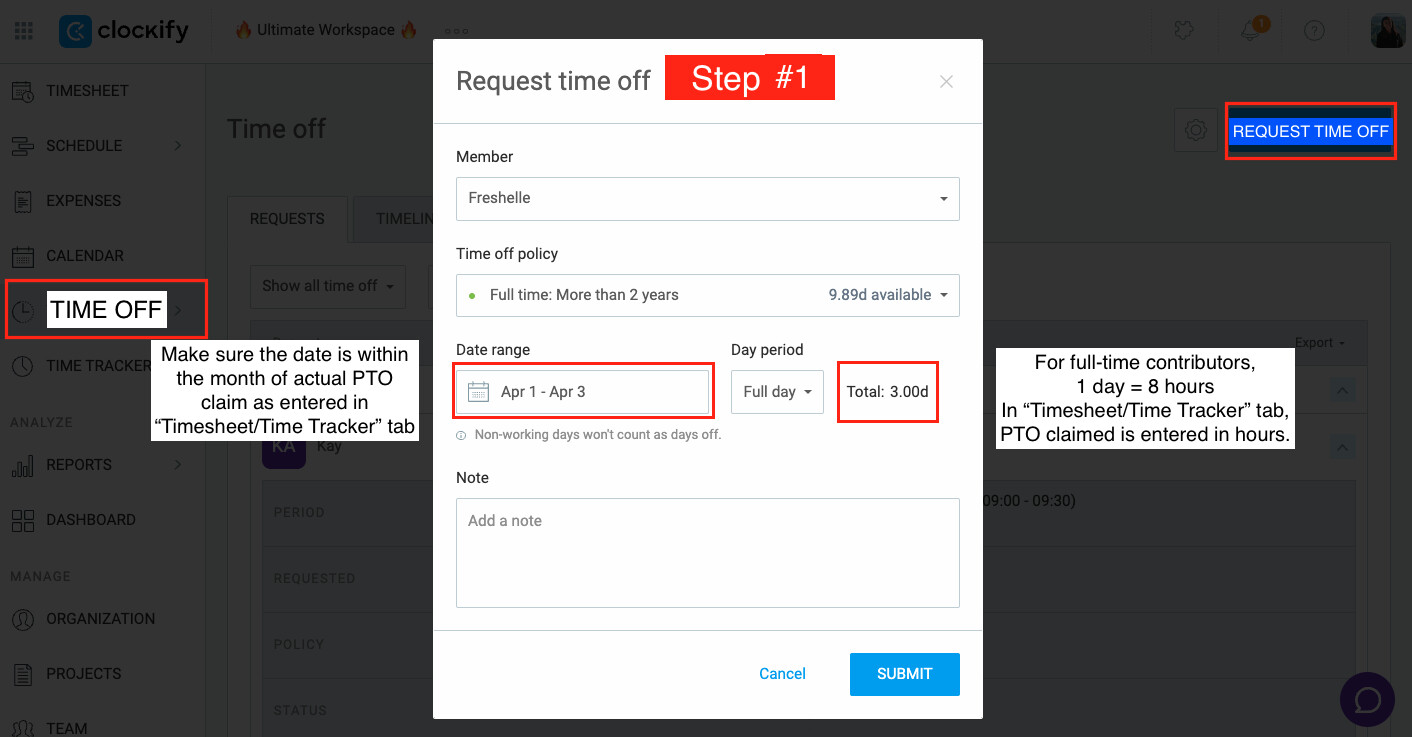
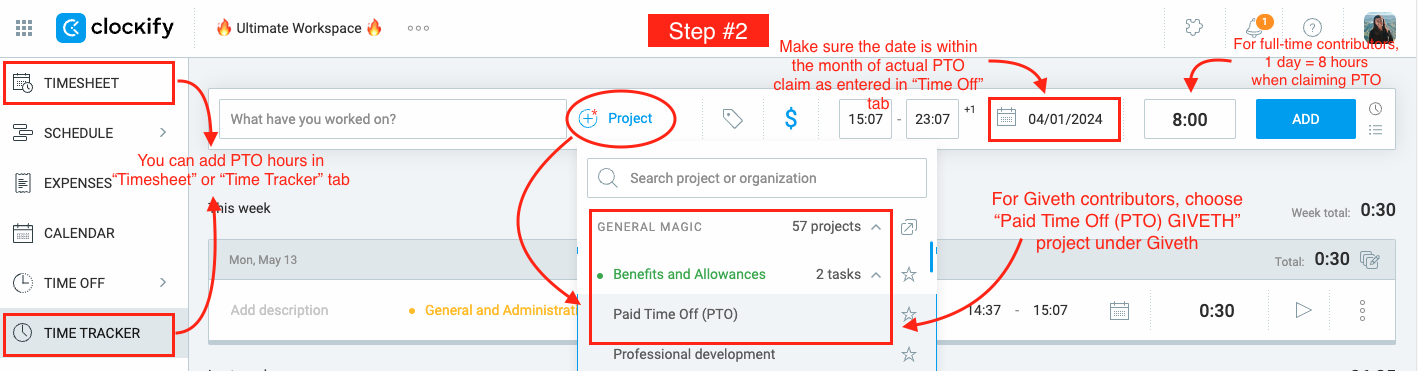
How to add Time Off
- Video guide for full-time and fixed
- Video guide or hourly
Steps on How to add Time Off
- Adding time off in Clockify should be in two places:
-
Time Offtab AND -
TimesheetorTime trackertab
-
Optional: You can notify in the discord “Team-availability” channel - specially if you need to step out unexpectedly, if you’re sick, and other urgent cases. Clockify should be the main reference for time offs.
-
Optional: Update your status or change your status on Discord and/or name in Telegram to “AFK/Away/Vacation until the X date.”
Video guide here.
How to View time-off
Go to Clockify. You can edit the period covered filter.
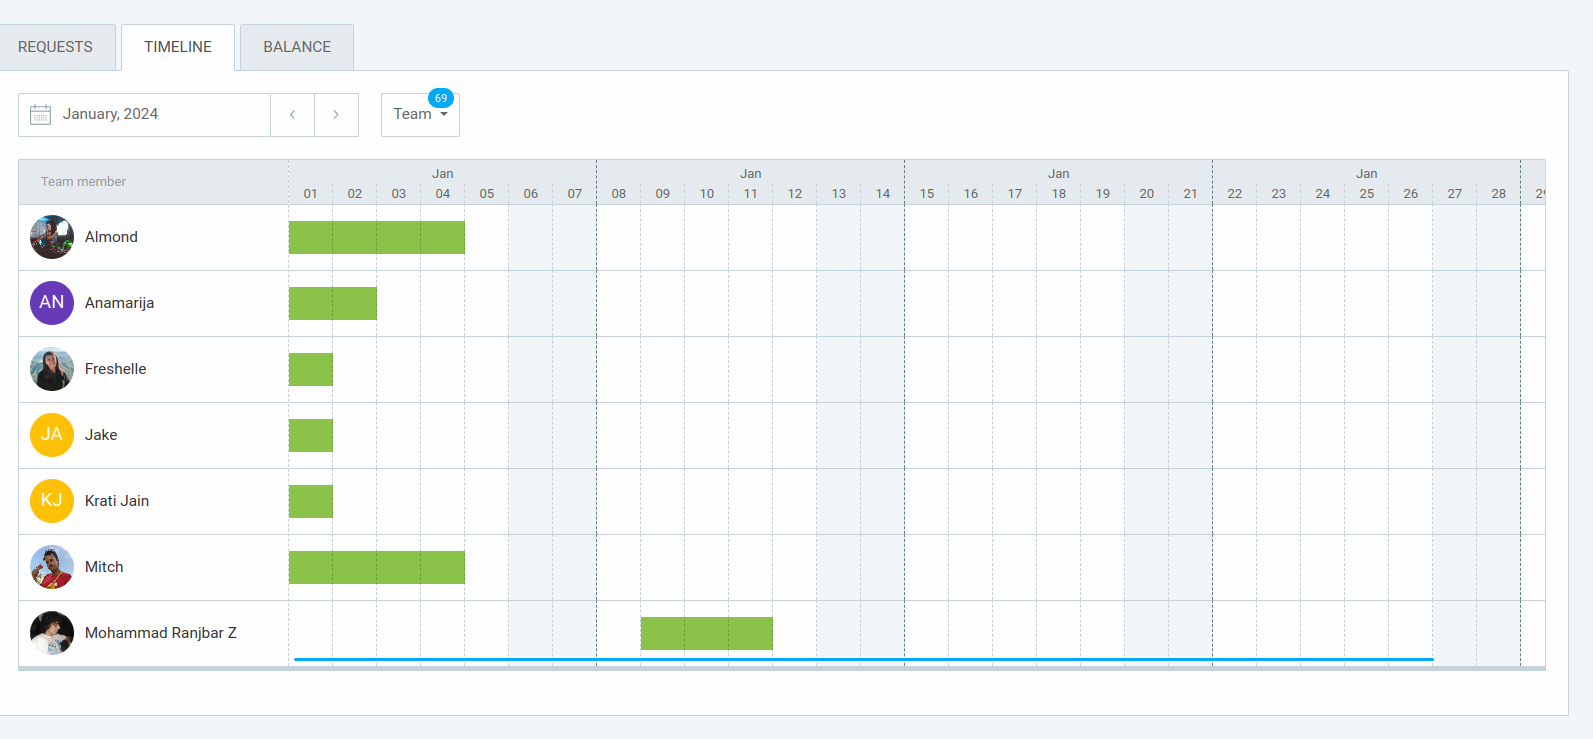
You can also check “Team-availability” discord channel to see upcoming time-offs.
How can PMs and Leaders Check Reports
![]()
![]() Video guide here.
Video guide here.
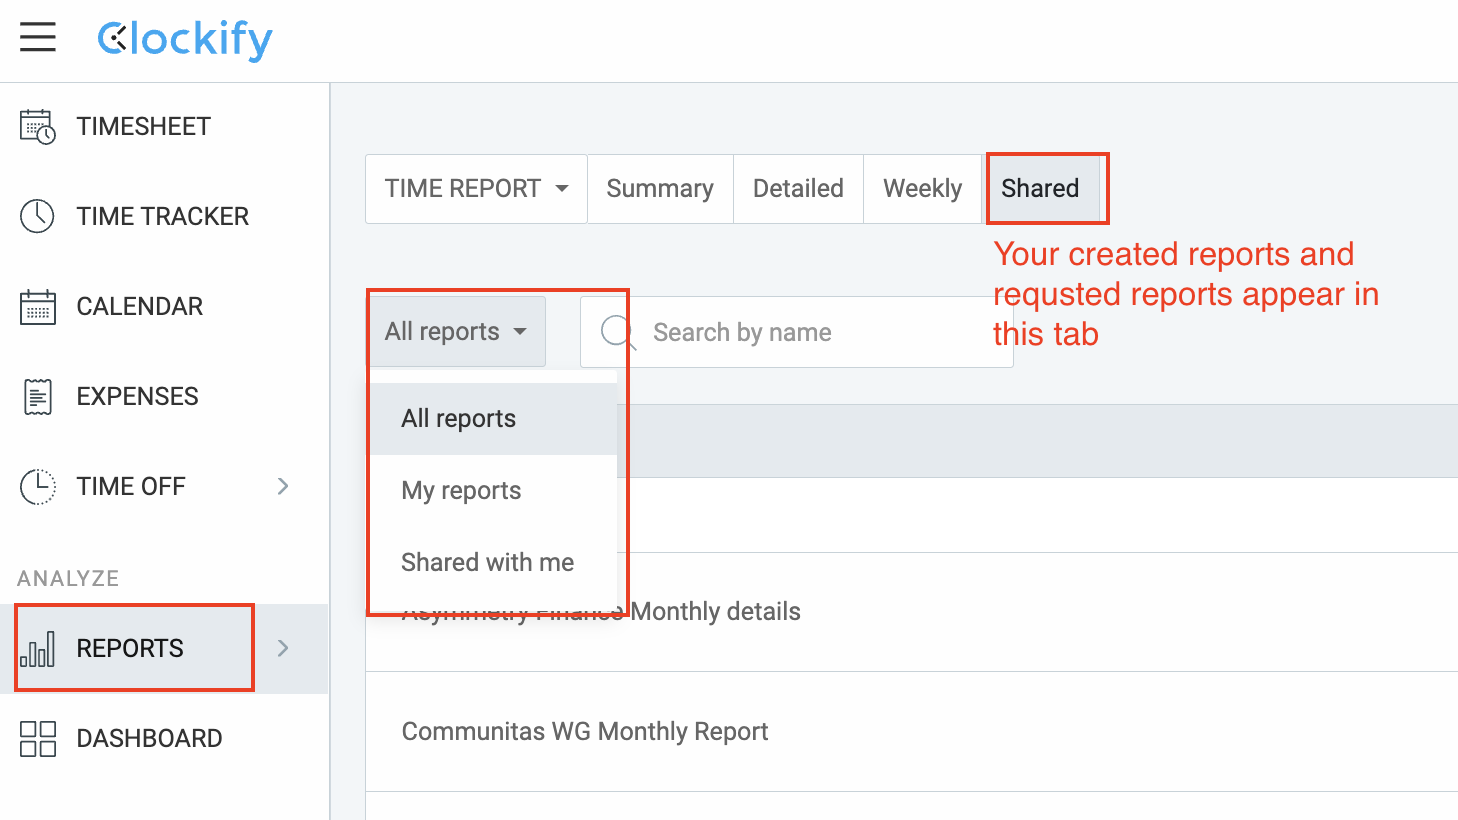
- Go to the reports tab and filter categories and period accordingly. By default, this would only show the number of hours. You save filtered reports.
- If you would like to request detailed and specific reports such as monthly cost for a working group, reach out to @freshelle. You can check the
Sharedtab underReportsto check.

How to Add Expenses
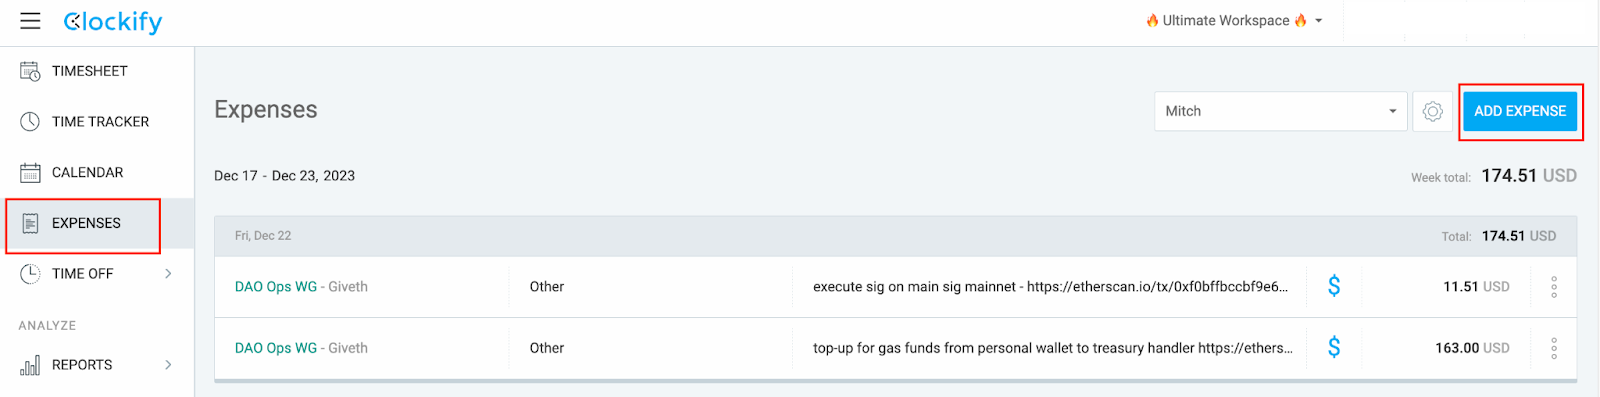
- Click on “Add expense” and tag the appropriate project or working group.
- Inform leads on the expenses submitted and request for reimbursement if applicable.
FAQs and Best Practices
-
Development Team Time Logging Guide
Check this guide on how to log work hours. -
Time entry consistency and accuracy.
Daily or weekly reporting is highly encouraged to accurately and properly account for hours spent on working groups or projects. It may be easier to recall with daily or weekly reporting compared to adding bulk hours at the end of the month. -
Team communication for accurate tagging.
If you can’t find a project in Clockify or should there be any questions about proper tagging, reach out to @freshelle. -
Regular reviewing of Time Off.
CheckTime Offregularly to see the availability of the team and your PTO balances. -
Report hours in Clockify on in a timely manner.
Ideally, time reports should be entered and finalized in Clockify on or before the 5th of the subsequent month. This is needed to make accounting reports accurately and timely as well.